Shortcut Actions
Load Menu Set
Once you've designed your menu in Menu Box, simply add a "Load Menu Set" action to a shortcut and select your set.
Now add a "Choose From List" action and run the shortcut to see your menu.
To perform actions when a menu item is chosen, add "if" actions to check the contents of the title.
Alternate Set
If you tap the "Show More" button on the action in Shortcuts, you'll see you can select an alternate set to load. This lets you show a different menu if a condition is met.
One example of this would be to show a different menu style if the device is currently in Dark Mode.
The example below shows how to set this up.
Dark Mode Menu
A demonstration of how to load different menus depending on whether light or dark mode is enabled.
Create Menu Item
There are three "Create Menu Item" shortcut actions; one use SFSymbols, one uses emoji and the other uses images (or a base64-encoded image).
The "create menu item" actions are useful for creating dynamic menus.
For example you could create menu items in a loop, adding each one to a variable then use a "Choose From List" to display your menu.
Alternatively, instead of displaying the menu, you could add it to Menu Box to use it later with the "Add Menu Set" action.
Get Menu Sets
This shortcut action lets you retrieve details about all of the sets stored in Menu Box.
This action shouldn't be used to display menus as the "Load Menu Set" is far faster, however an example of something this action could help with, it building a shortcut that backs up or shares your sets.
Quick Menu
Menu Box's "Quick Menu" action in Shortcuts is a powerful way of creating dynamic menus.
Rather than designing a menu visually in the Menu Box app, you can use simple, marked-up text to create your menus on the fly.
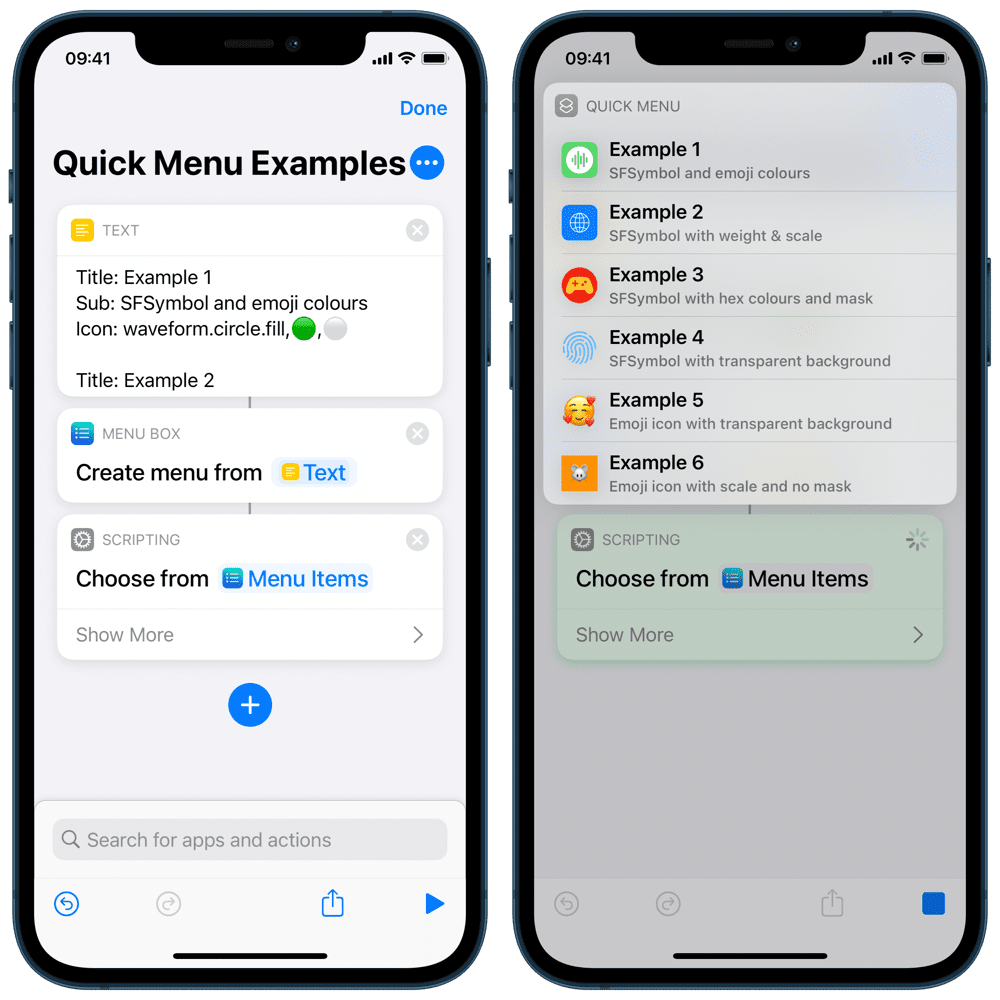
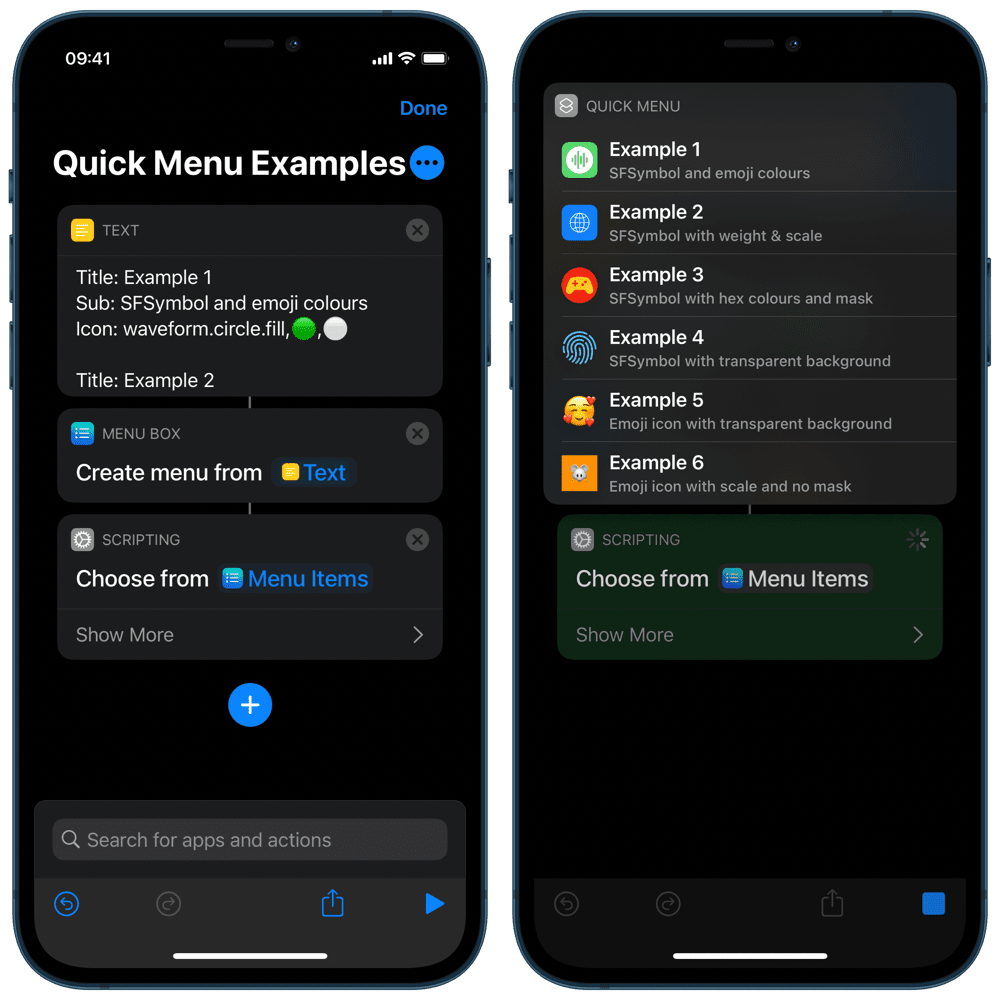
Quick Menu Demo
Examples of different types of icon you can generate with the Quick Menu action.
Example
The format of a quick menu item is the name of the parameter, a colon and then the value.
Values are case-insensitive.
Each menu item should be separated by an empty line.
The example text below would result in two menu items:
Title: Example 1
Sub: Subtitle text
Icon: globe,🔵,⚪️

Title: Example 2
Sub: Subtitle text
Icon: 😁,nil
Every menu item requires a title:
Title: Hello World
You can then add an optional subtitle:
Sub: This is a subtitle
SFSymbols
For your icon you can use any one of Apple's library of 2,400 SFSymbols, which can be browsed in the Menu Box app:
Icon: globe
You can also append a weight to the end of the icon name:
Icon: globe.ultralight
These are the valid weights:
.ultralight.thin.light.regular.medium.semibold.bold.heavy.black
Emoji
Alternatively, you can also use a single emoji for your icon:
Icon: 😀
Colours
You can specify the colours of an icon with two comma-separated values after the icon - the background colour, then the icon colour:
Icon: globe,blue,white
Colours are very flexible, you can use the iOS system colour names:
- Black
- Blue
- Green
- Grey (or Gray)
- Indigo
- Orange
- Pink
- Purple
- Red
- Teal
- White
- Yellow
Or if you want to be more specific, you can use a 6-digit hex code (eg "ffffff" is white).
You can also use any solid colour circle or square emoji, like 🟨 🔴 🟦.
If you want the background to be transparent, you can use "nil", "clear", "none" or "0".
Finally, you can select a random system colour using "randomSystem" or 🌈 or a random hue value, using "random" or 🎲.
Omitting colours will default to white on blue for an SFSymbol icon, or a transparent background for an emoji icon.
Masks
By default, the icons are masked to rounded rectangles, however you can remove a menu item's mask with:
Mask: none
Or you can use a circular mask with:
Mask: circle
Scale
Icons can be small, medium or large.
By default, SFSymbols are medium whilst emoji icons are large.
You can specify which one you want to use:
Scale: large
Data Fields
Menu Items have 4 data fields which can contain text that can't be seen in the menu but can be accessed from the chosen item.
You can optionally add any of these fields as follows:
Field1: Example text
Field2: Example text
Field3: Example text
Field4: Example text
Menu Box Icon
A third option for your menu item's icon is to reference an existing icon you've created in the Menu Box app.
Simply long-press on the desired item in Menu Box, and "Copy As > Icon ID".
You can then use it as follows:
ID: 33D9E712-6AAD-43C7
Please note that you use "ID" instead of "Icon" when referencing an icon.
You can also copy a whole menu set as pre-formatted text by navigating to the menu set and selecting "Copy Quick Menu" from the drop-down menu.
Base64
The final way of adding an icon to your menu item is to use a base64-encoded string.
This must be encoded without line breaks:
B64: Base64StringHere
Please note that no processing is performed on the base64 image - it isn't resized or masked.
This means it is practically instant to load but you need to do any resizing or masking manually before encoding.
Copy As Quick Menu
You can copy any menu item or menu set as text which is formatted for the Quick Menu action.
This is useful if you have designed a menu but want to embed it in a shortcut to share with others, or if you just want to use it as a starting point for a different menu.
You can copy the Quick Menu as "dynamic" or "static".
"Dynamic" retains the name of the icon along with the hex colours, weight, mask and scale in the text.
"Static" will just use the ID of the icon that's already been rendered in Menu Box.
Add to Menu Set
This shortcut action lets you add menu items into a new or existing set in the Menu Box app.
You can pass it menu items from the "Quick Menu" action, "Create Menu Items" actions or from the "Load Menu Set" action.
Import Menu Sets
Exporting
You can export menu items you've created by selecting "Export" from a set's drop-down menu.
The menu items will be saved as a .JSON text file.
You can also export Menu Sets in Shortcuts using the "Get Menu Sets" action.
Each resulting menu set object contains a JSON file which can be saved or shared.
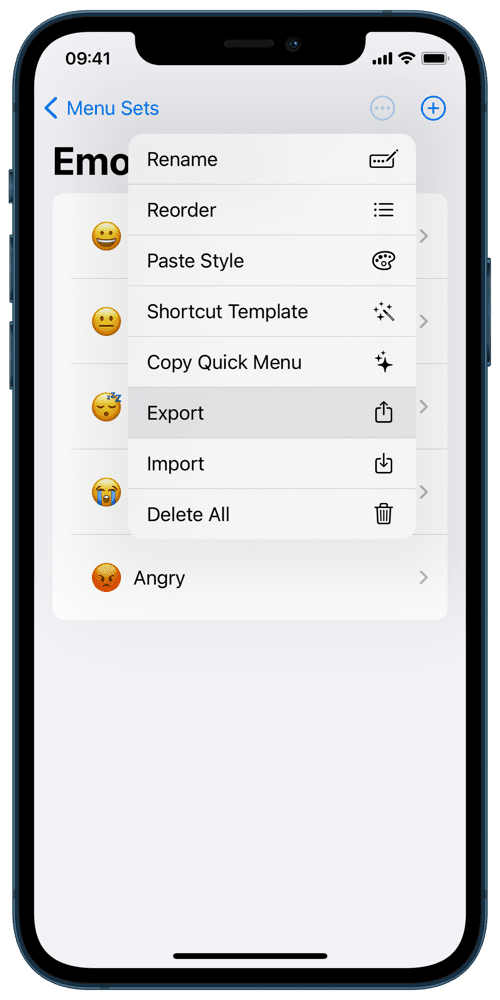
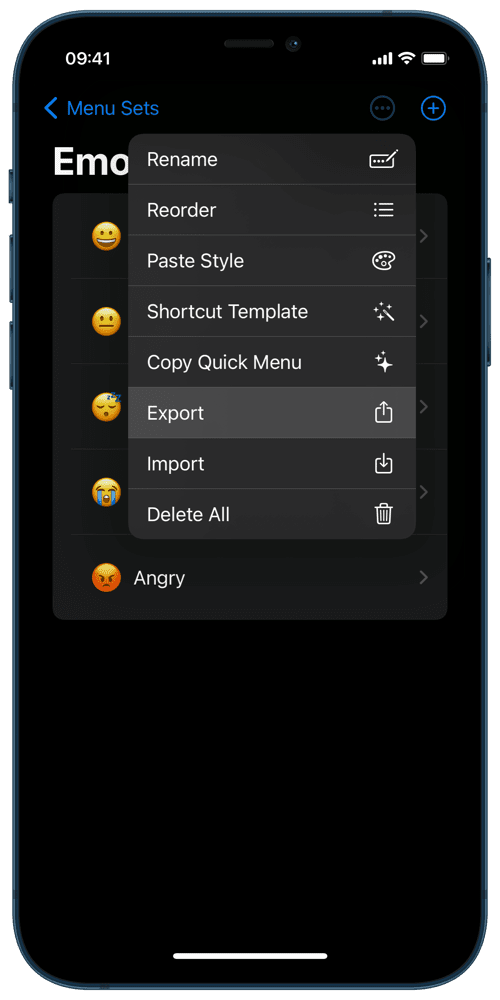
Importing
You can import menu items directly into a set by selecting "Import" from a set's drop-down menu.
You can also import menu sets from inside Shortcuts using the "Import Menu Sets" action.
You can only import menu items from a .JSON file exported from Menu Box.